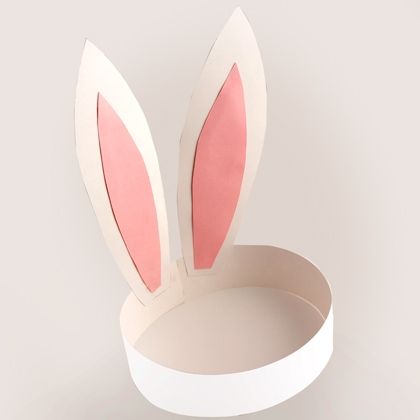
The Easter bunny is coming THIS weekend! Get ready for a hopping celebration by making your very own bunny ears!
Supplies:
- Construction paper in white and pink
- Scissors
- Glue
- Stapler
Directions:
- Use white and pink construction paper to cut out bunny-ear shapes: two white and two pink, the pink being slightly smaller.
- Glue the pink ears onto the white ears.
- Glue the ears onto a long strip of construction paper, measure to fit your child’s head, and staple the ends together to form a headband.
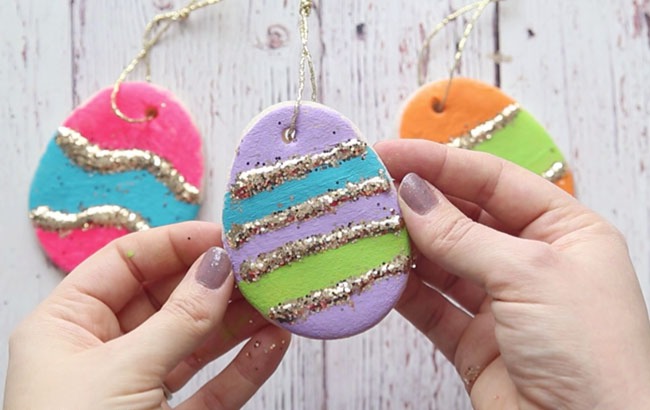
Easter is just around the corner, time to decorate so a certain bunny knows how to find your house! With just three ingredients you can make these salt dough egg ornaments and let your kids decorate them!
Ingredients for Salt Dough:
- 4 cups all purpose flour
- 1 cup salt
- 1.5 cups warm water
Directions:
- Preheat your oven to 250 degrees Fahrenheit.
- Combine all of your ingredients and knead for 10 minutes. If your dough is too dry add a little bit more water in and continue to knead.
- Roll out the dough to a thickness that you’d like your salt dough ornament to be.
- Cut out eggs (if you have a cookie cutter great, otherwise just use a knife and do your best!)
- Using a straw, make a hole in the top for where you want to hang your salt dough ornament.
- Bake for 1-2 hours. If your ornaments are still doughy, put back in for another hour. (It will depend on your thickness how long you need to bake for. The thinner ornaments will take less time but thicker may take more).
- Once cool, you can decorate! Use paints, glitter, glue on materials, whatever you have, get creative!
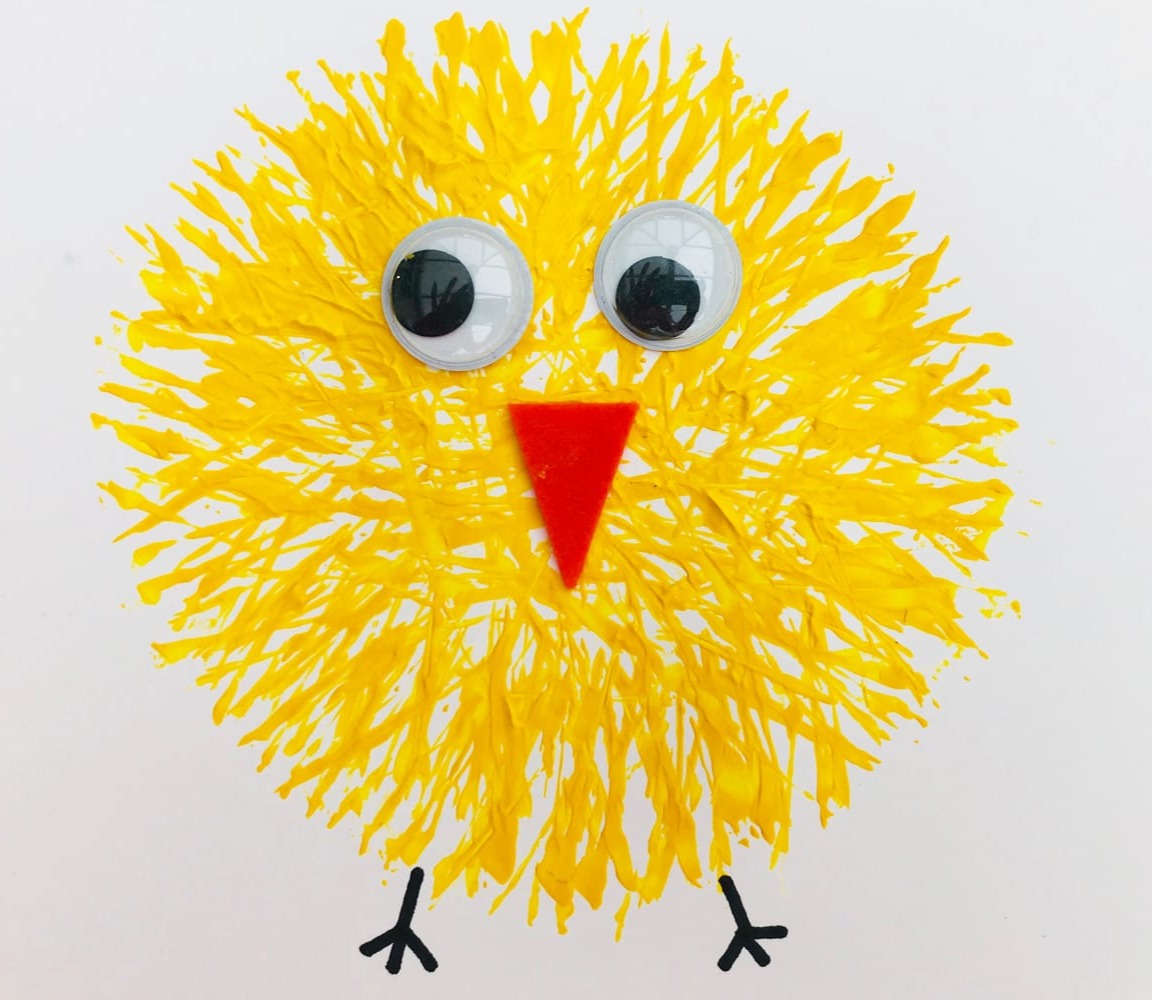
Today let’s make adorable little chicks! We’re sure everyone has done their fair share of painting with brushes and hands, but what about forks?!
Supplies:
- A plastic fork
- Yellow paint
- Googly eyes (or just draw on your own)
- Orange construction paper
- Scissors
- Glue
- Black pen
Directions:
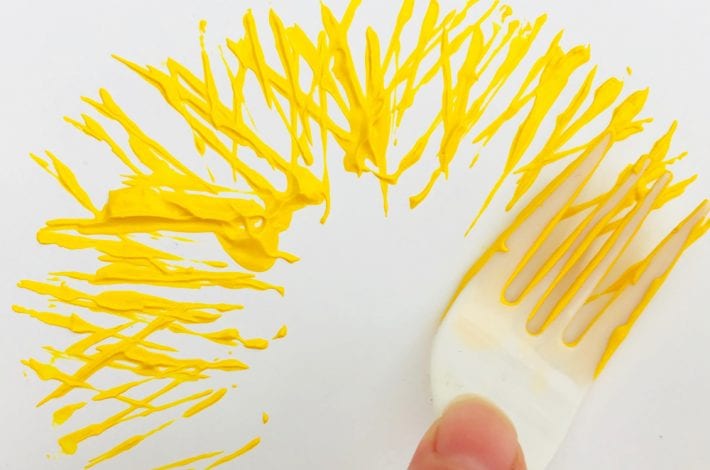
- Dip the back of your fork into yellow paint and print onto a piece of paper or card. Keep adding more and more prints, moving round in a circle to start making your little chick.
- Keep printing with your fork until you have covered a complete circle. Overlap the fork prints to make your chick nice and fluffy.
- Cut a small triangle of orange construction paper and glue in in place for the beak. Then stick on some fun googly eyes. If you don’t have googly eyes you can draw eyes on using your black marker.
- Use your black marker to add on some little legs for your chick and to complete your painting.
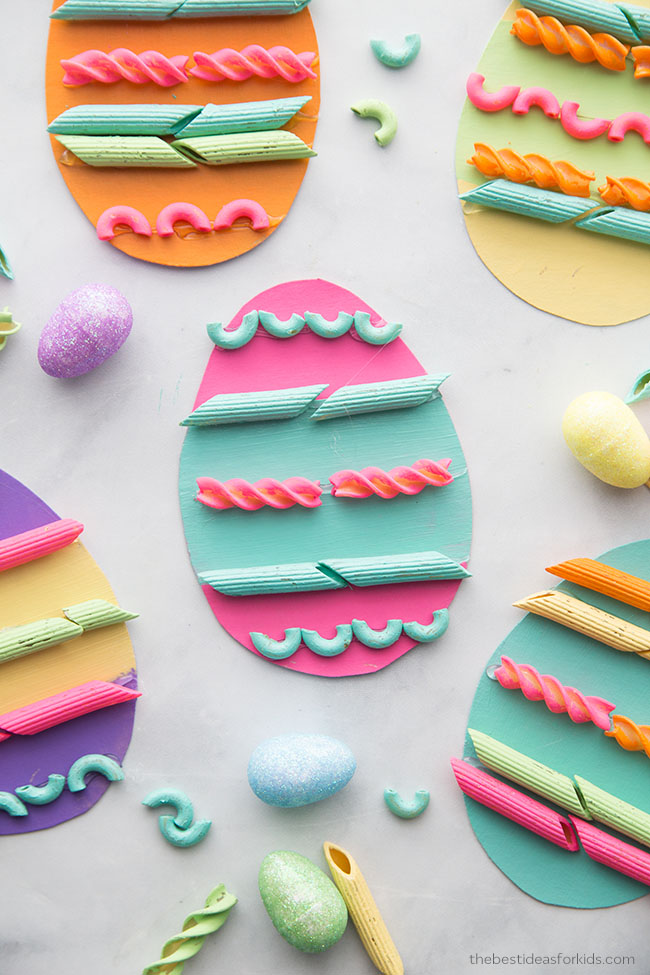
Decorate your Easter eggs with colorful pasta! This craft is not only fun, it’s super easy, so your little ones can do most of the work. Every egg SHOULD be different, so get creative, there’s no way to decorate wrong 🙂
Supplies:
- Cardboard or paper for eggs
- paint or markers
- pasta- penne, fusili, etc
- glue
Directions:
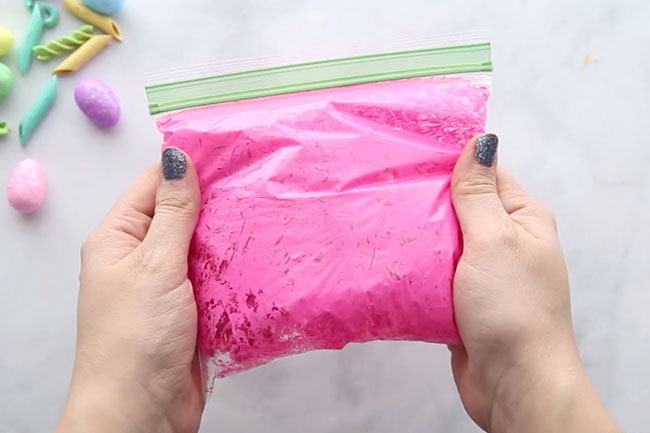
- You can either paint the pasta all together in advance or let your kids color in the pasta with markers piece by piece. If you choose to paint the pasta, put it into different zippered bags and then put different color paint in with each bag. Squish pasta around in bag to coat. Lay out to dry.
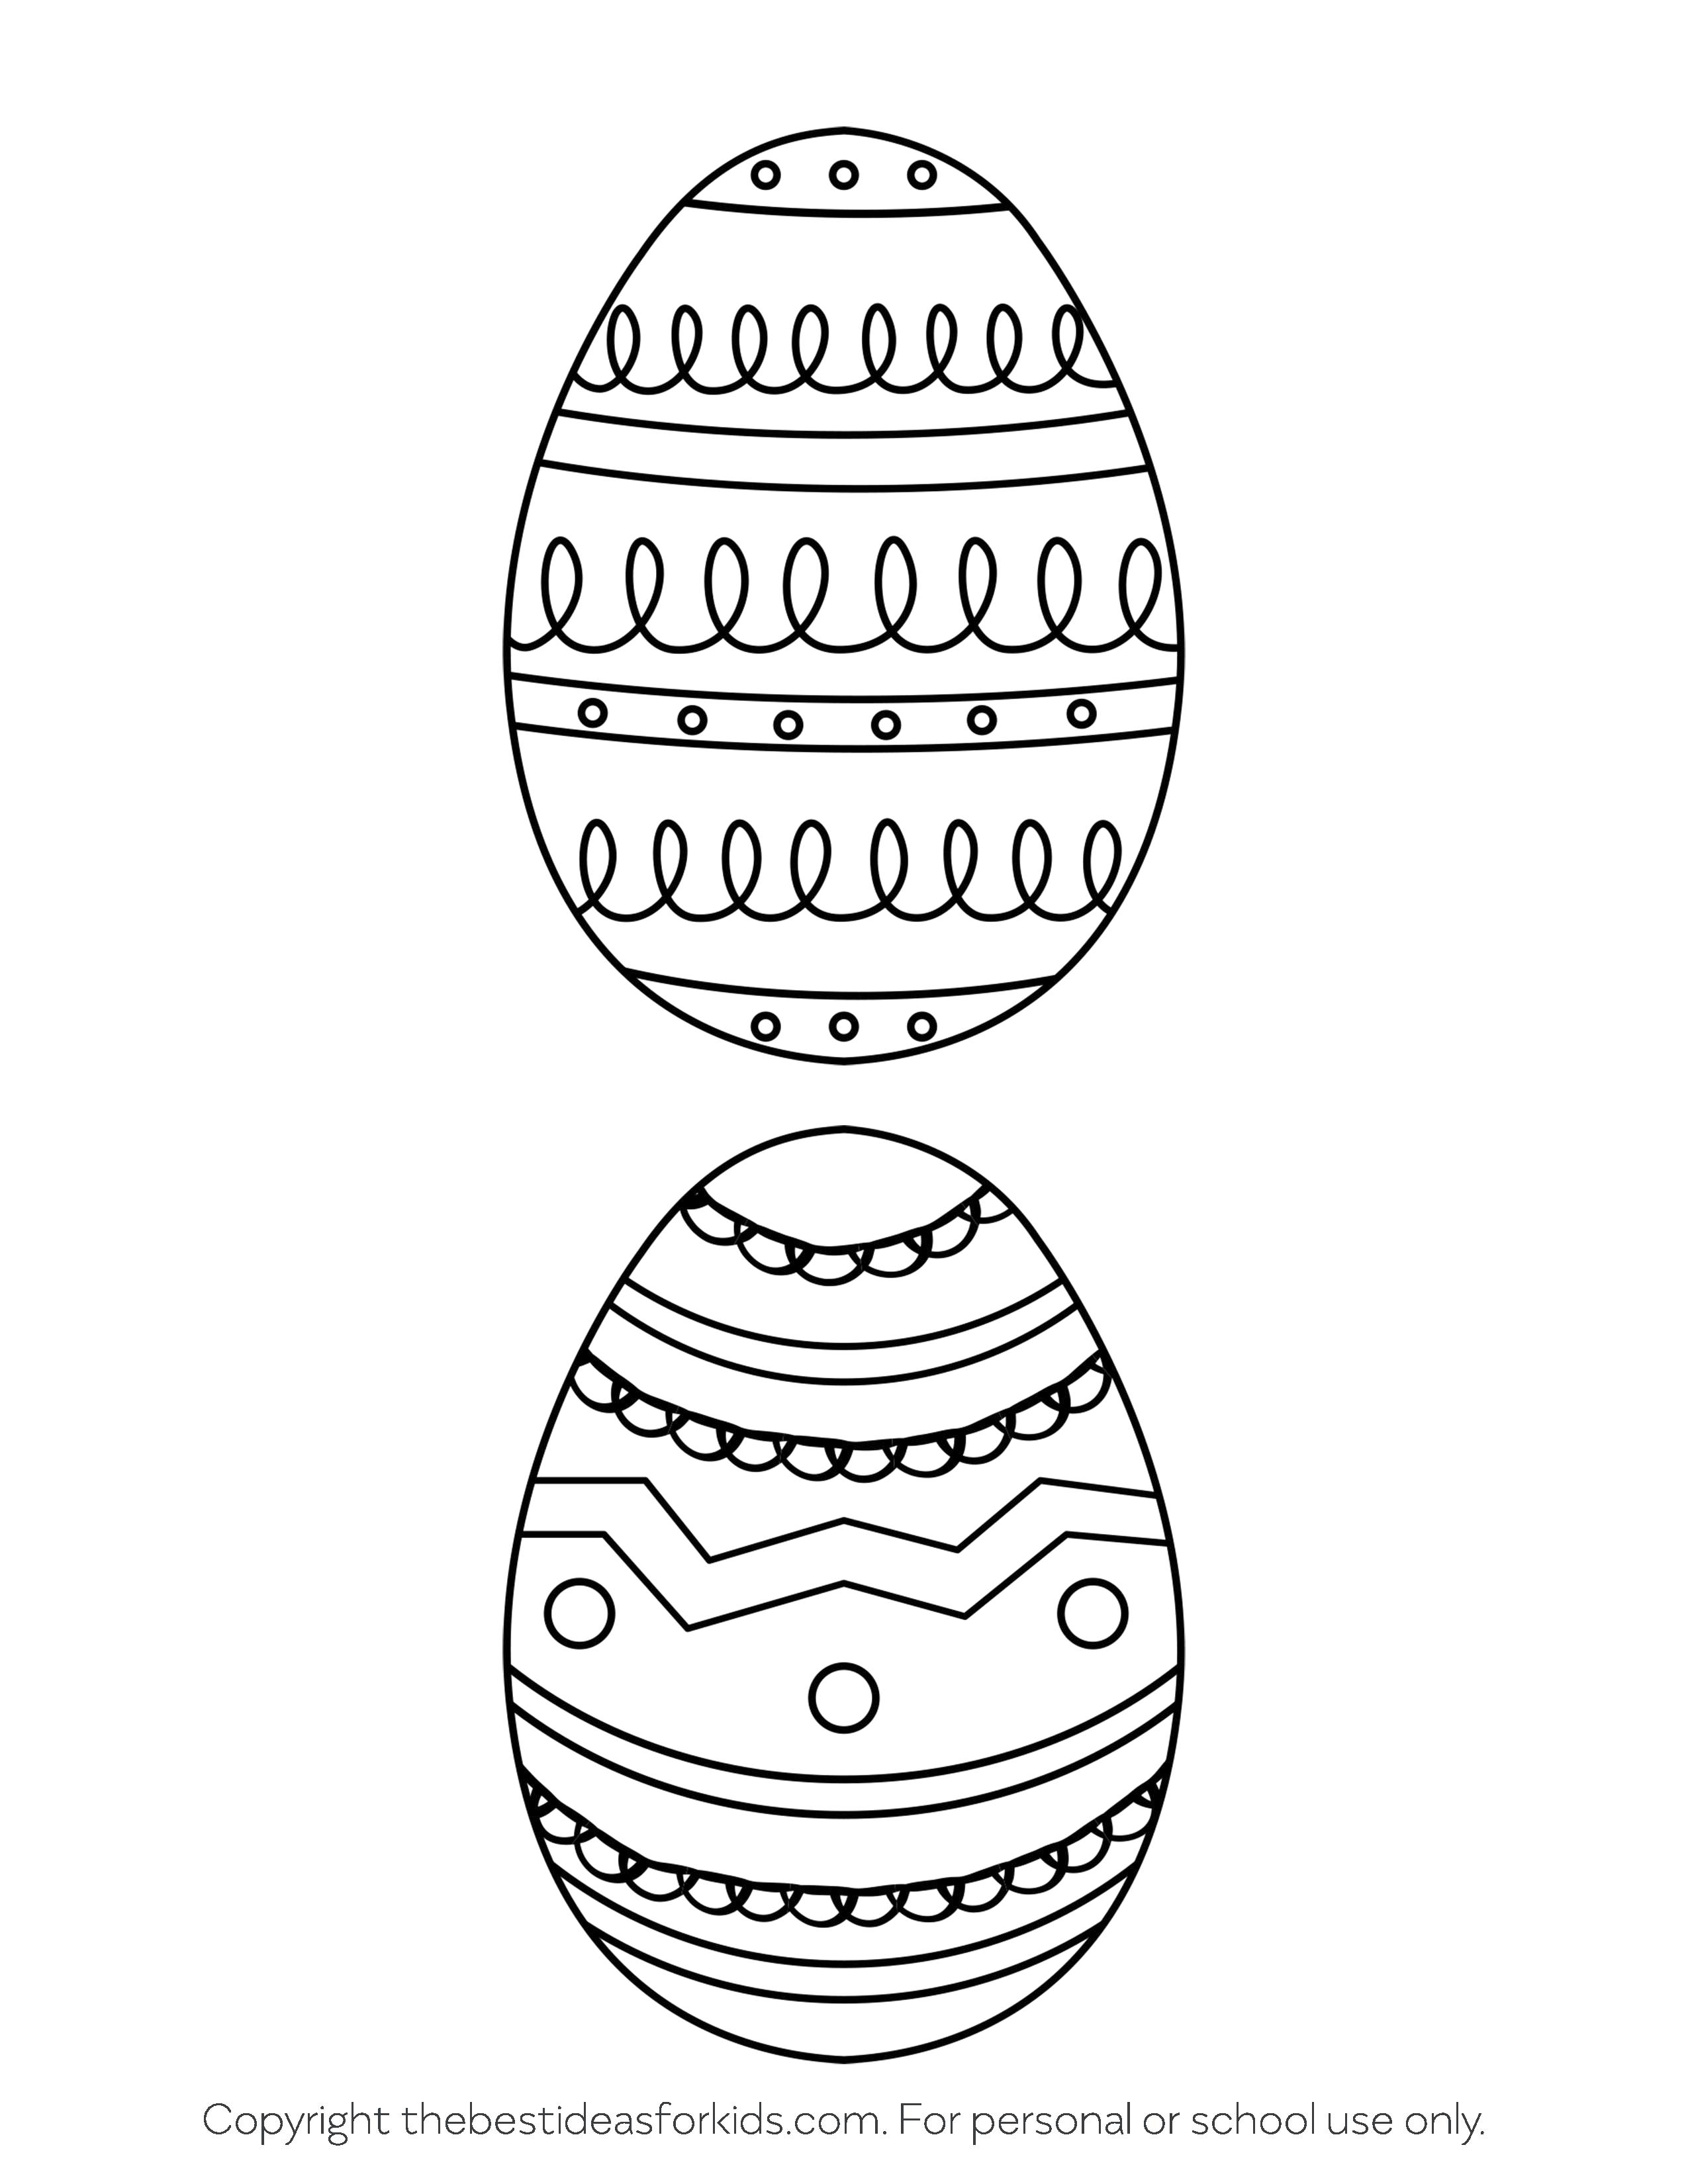
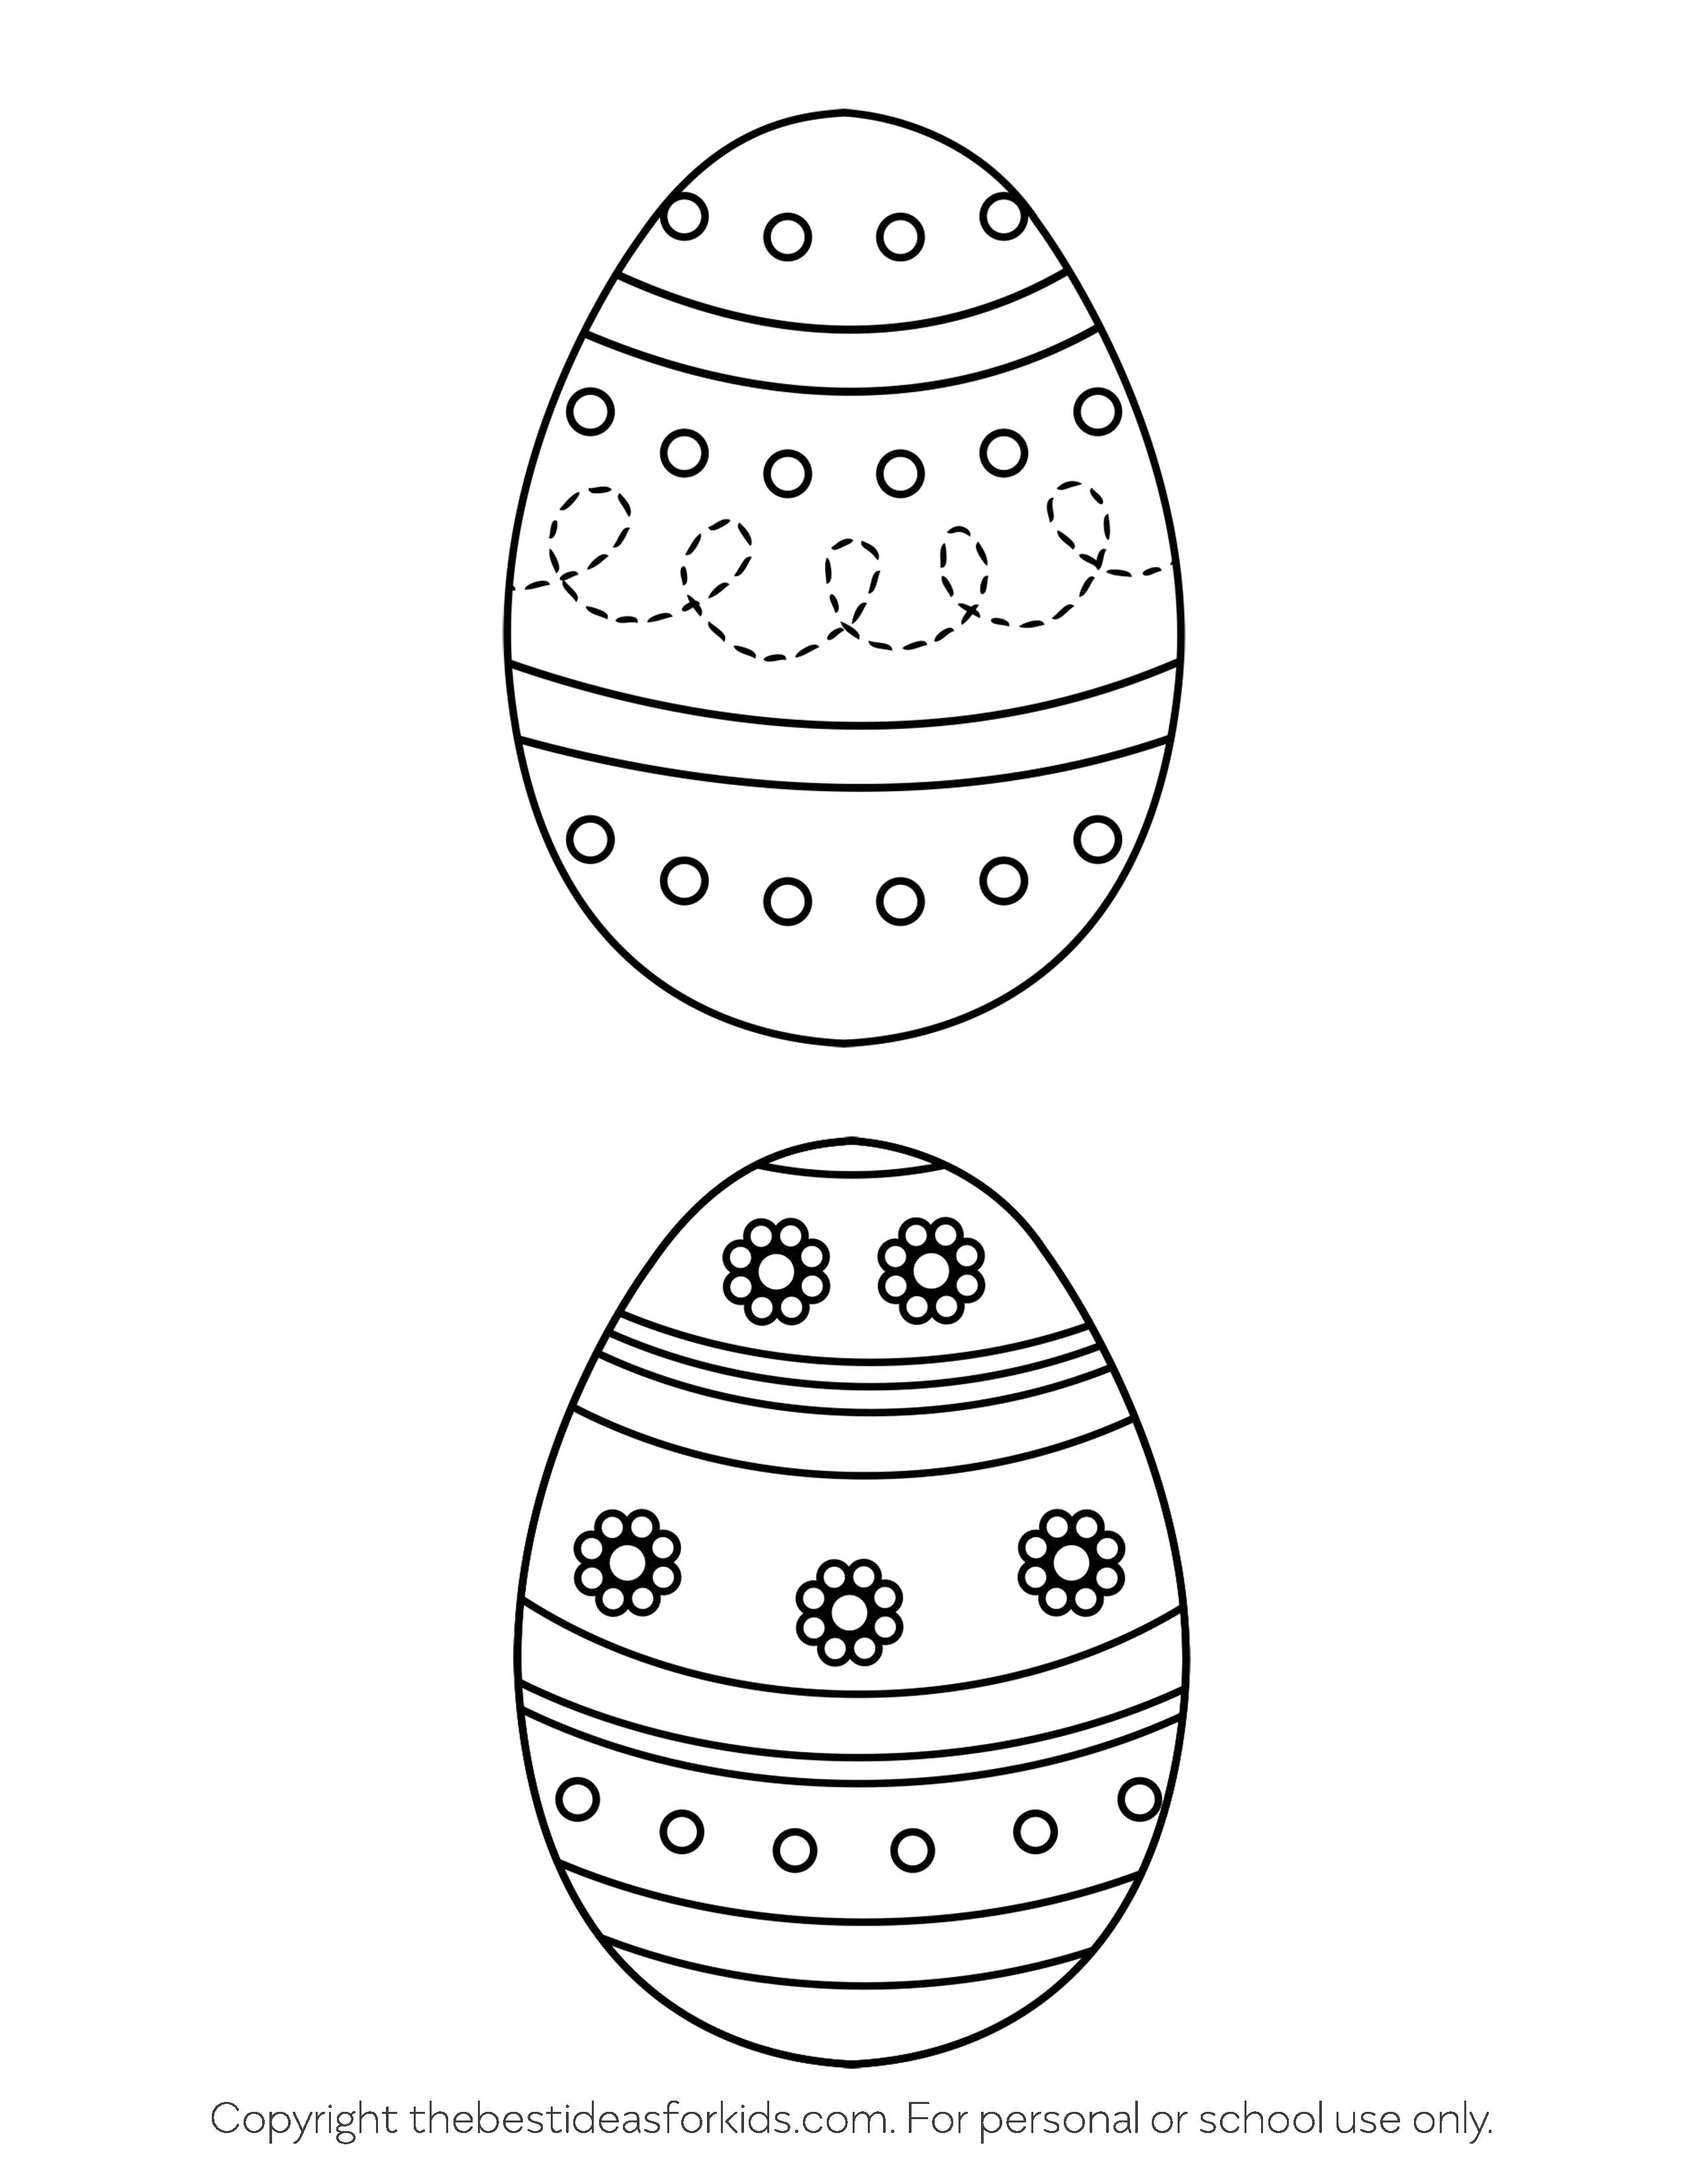
- Use the template below to trace and cut out your eggs—if you have it, use cardboard to create a sturdier egg.
- Paint or color your eggs. You can keep them all one color, or create designs. Use the templates below (they can be glued onto your cardboard) or create your very own designs.
- If you used paint, let your eggs dry.
- Glue on your pasta!
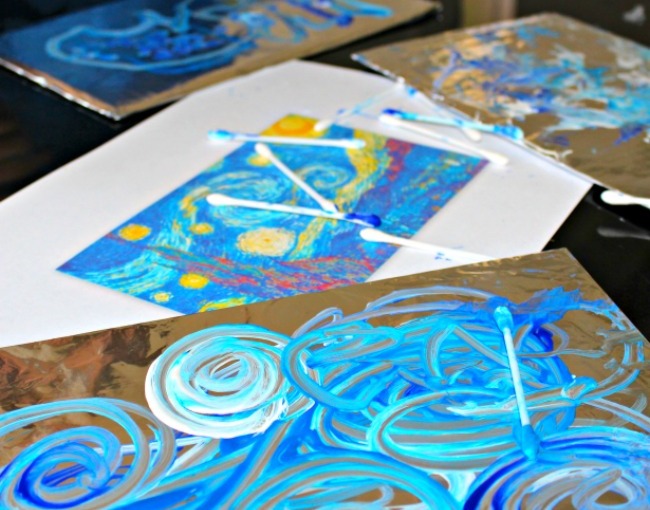
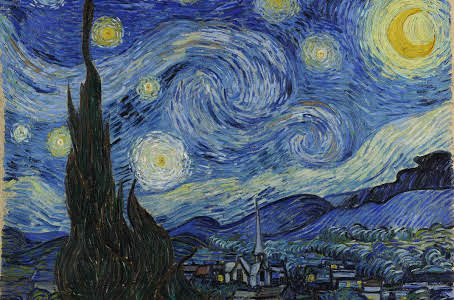
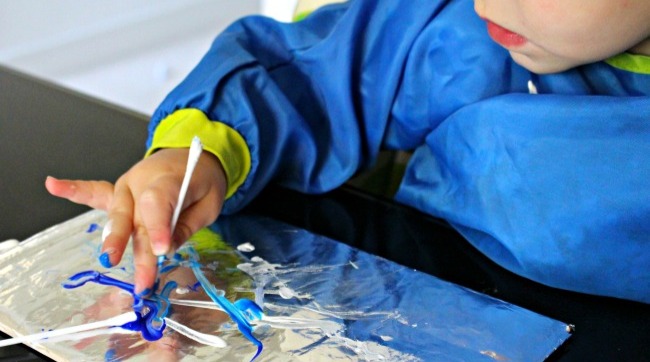
Today we are going to create our very own Starry Night. Show your child a picture of Van Gogh’s painting for inspiration! Don’t forget to send in your masterpiece to be showcased in our art show! [email protected]
Supplies:
- A piece of cardboard (guessing we all have some delivery boxes laying around lately!)
- Foil
- Tape
- Q Tips (you can also use small cars or trucks to drive through the paint)
- Paint (you can stick to just a few shades of blue and a white or add in yellow and black to try and recreate Starry Night)
- Plate or other surface to put your paint on
Directions:
- Wrap tin foil around your cardboard and tape it down.
- Put your different paint colors onto your plate
- Time paint! Dip your Q Tip or truck into the paint and move it around the tin foil
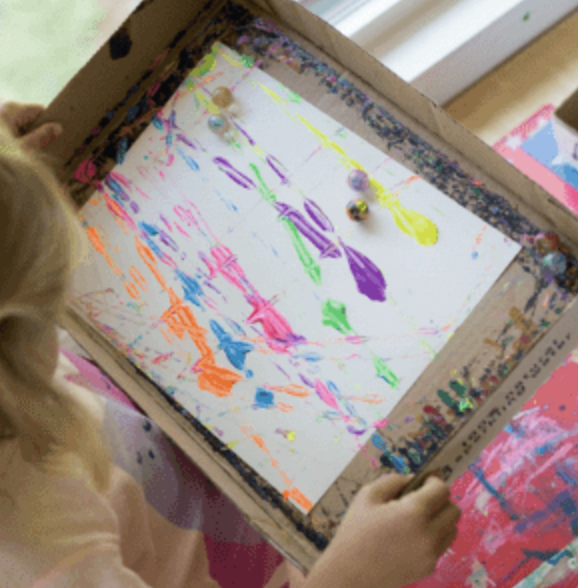
Today we’re going to make some abstract art! Using marbles and paint we can create beautiful one-of-a-kind artwork like Jackson Pollock’s famous spatter paintings. Don’t forget to send in your masterpiece so we can showcase it in the art show! [email protected]
Materials
- Marbles
- Paint
- Muffin tin, egg carton, or small bowls to hold the paints
- Spoons
- Paper
- Shallow cardboard box or a baking dish
Directions
- Put different color paints in the muffin tin sections (or egg carton or bowls) and place a sheet of paper in your shallow box or baking dish
- Drop marbles into the paint colors. Use your spoons to mix them around so they get coated in the paint. (you can use as many or as little marbles as you like)
- Using your spoons, scoop up your paint covered marbles and put them into your box with the paper
- Start painting! Move the box around to make the marbles roll and paint a masterpiece!
- If you need more paint, drop marbles back into paint and repeat.
Supplies:
- 1 sheet of bright paper 11″ x 14″ for the background
- 2 5.5″x 7″ rectangles of bright paper (different colors than your background)
- 4 5.5″x 7″ rectangles of bright paper (assorted brights so that the hands cut from these papers are different than the backgrounds)
- Pencil
- Scissors
- Glue stick
- Black paint
- Paper plate or alternative option to hold paint
Directions:
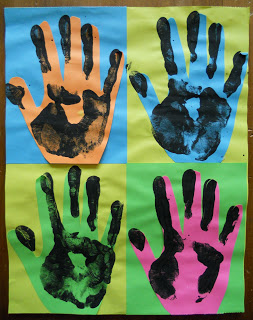
- Select one 11″ x 14″ piece of bright paper for their background. In the above image, the background piece is yellow.
- Then select two rectangles (5.5″ x 7″ each) these needed to be different than their background paper. Glue down to the background so that it appeared the background is divided into four sections. For a reference, in the photo, we used a blue and a green rectangle, allowing yellow background color to show in other areas.
- Stack four rectangles (each 5.5″ x 7″) of assorted colors (you can staple or clip them together so they hold) and trace your hand onto the stack. Cut through all four at once with scissors to create four identical hand shapes.
- Remove the staples or clip, arrange onto the background and glue down using the glue stick. Glue the fingers down well so they don’t curl off of the page.
- Put some black paint onto a paper plate and lay your hand in it and then stamp onto each hand glued to your project.
Don’t forget to send in your final project to have it featured in our art show at the end of the week! [email protected]
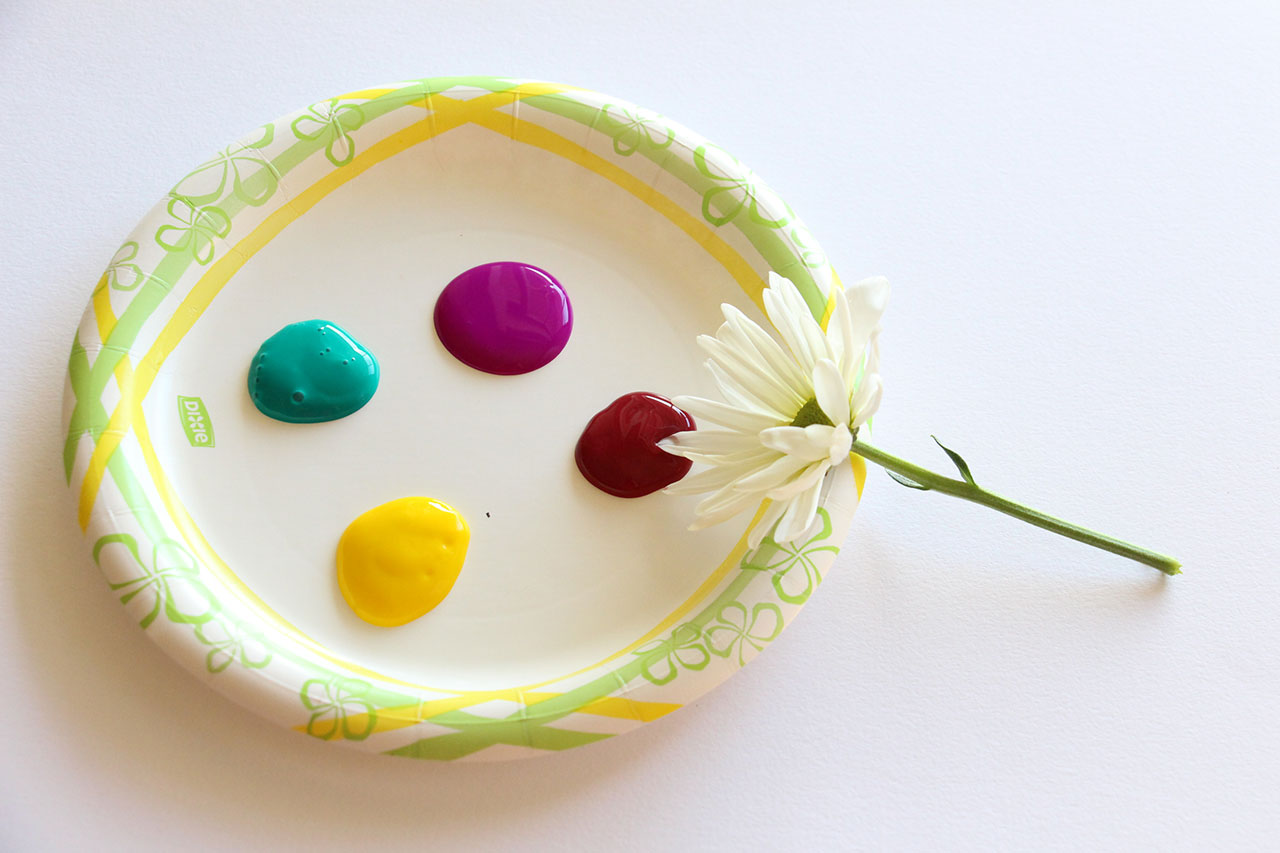
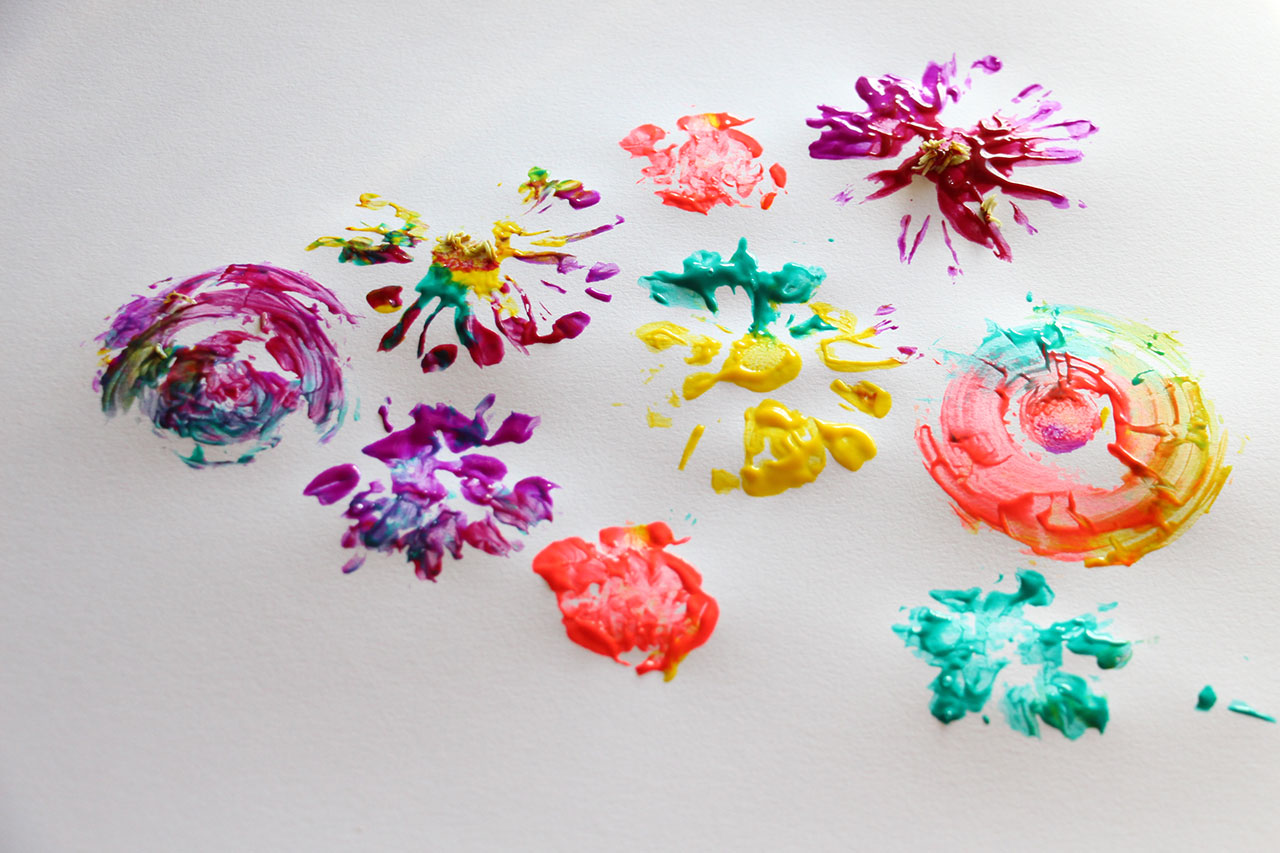
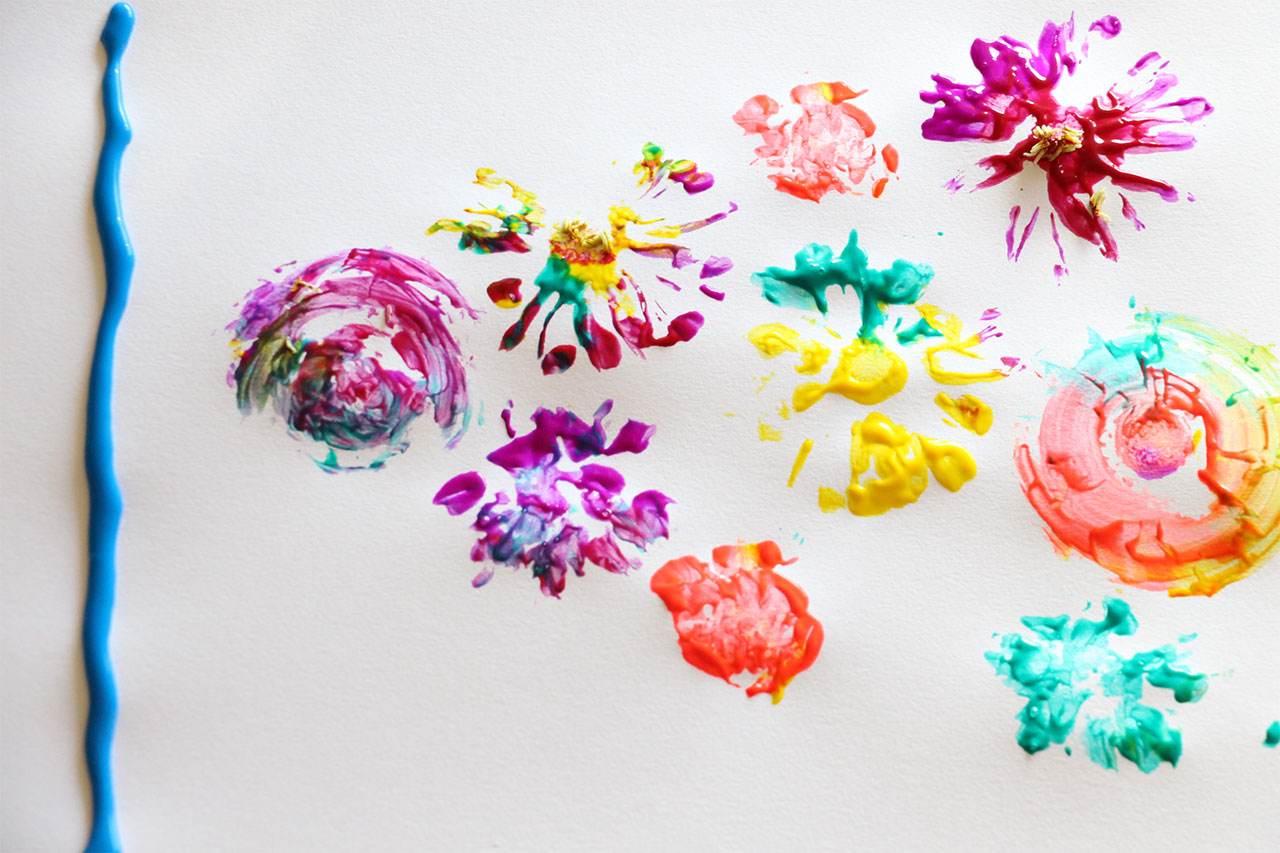
Today let’s make our own Monet! Recreate his famous Water Lilies painting with paint and flowers! First you will need to head outside to hunt for flowers—or other outdoor treasures like leaves, pinecones, sticks—and then it’s time to paint!
Supplies:
- Table covering
- Paper
- Paint
- Paper plate (or another surface to put paint on)
- Flowers (or other outdoor treasures like leaves and pinecones)
- Ruler
How To:
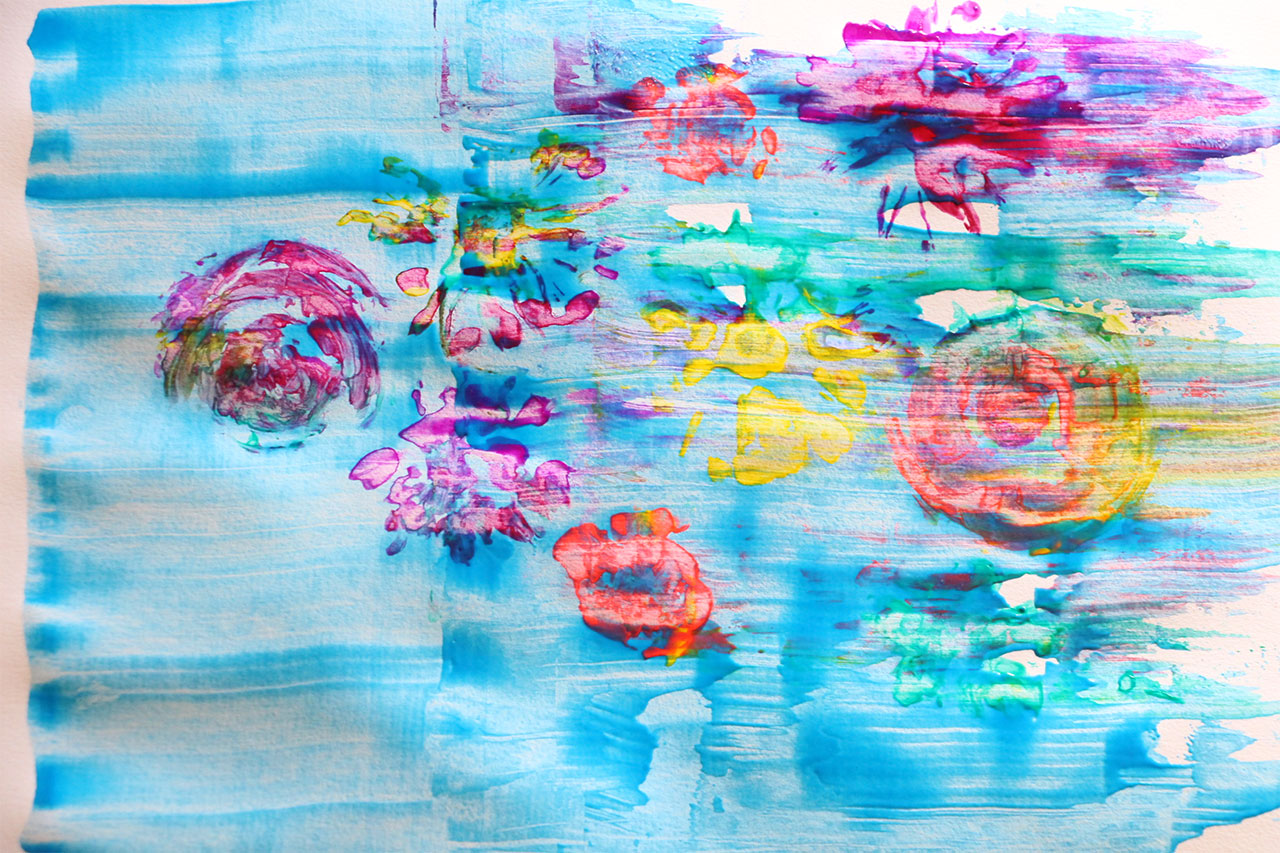
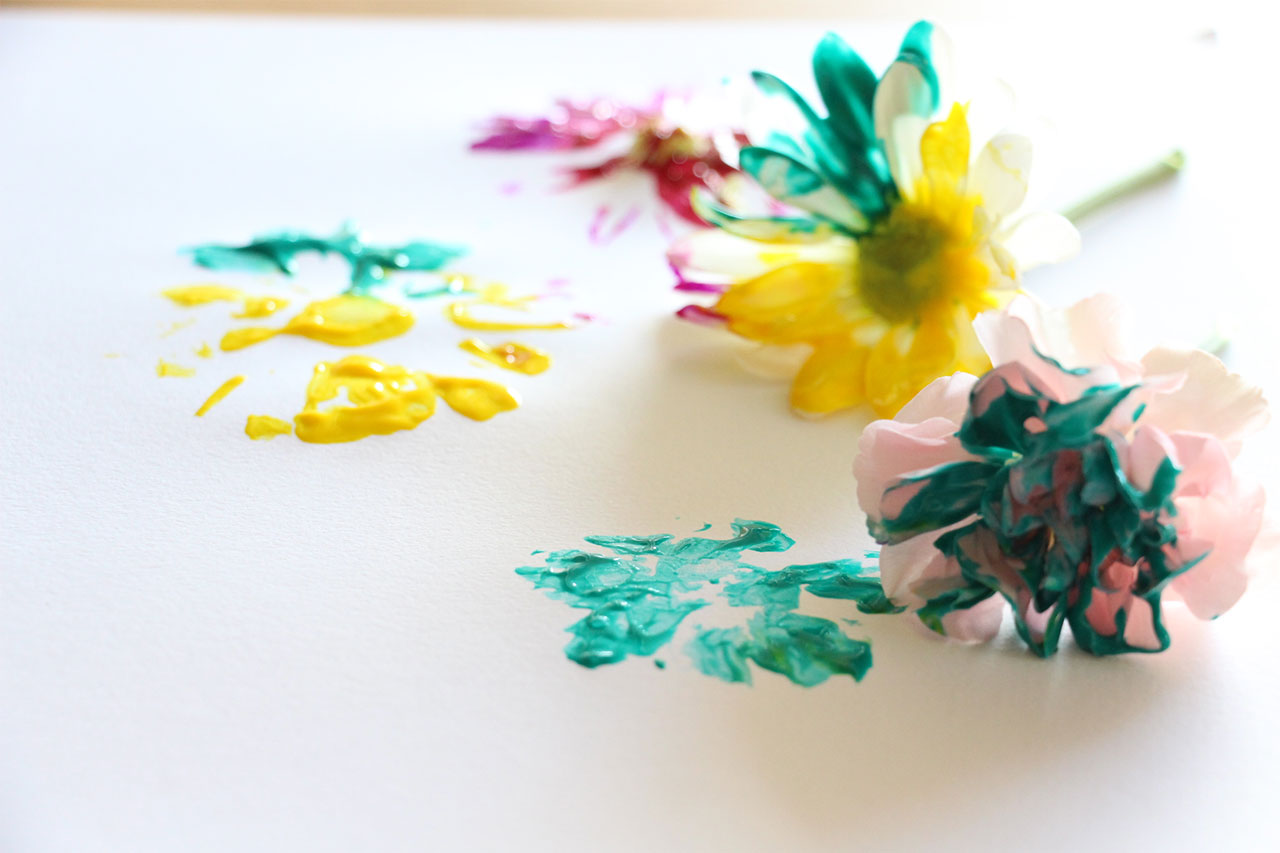
Squeeze blobs of paint onto the paper plate, leaving plenty of room to press the flowers down into the paint. Now it’s time for flower painting fun! You are essentially replacing your paint brush with a fresh flower, so dip the flower into the paint, then press onto your paper. You can experiment with mixing paint colors and using differently shaped flowers as you cover your paper with flower prints.
Don’t worry if petals or other parts of the flowers get stuck in the paint—that just adds fabulous texture! Show your child how to twirl the flower back and forth in a circular motion to create a different type of mark. Younger children may also enjoy brushing the flower across the page just like they would with a paint brush.
Once your masterpiece is complete, set aside to dry
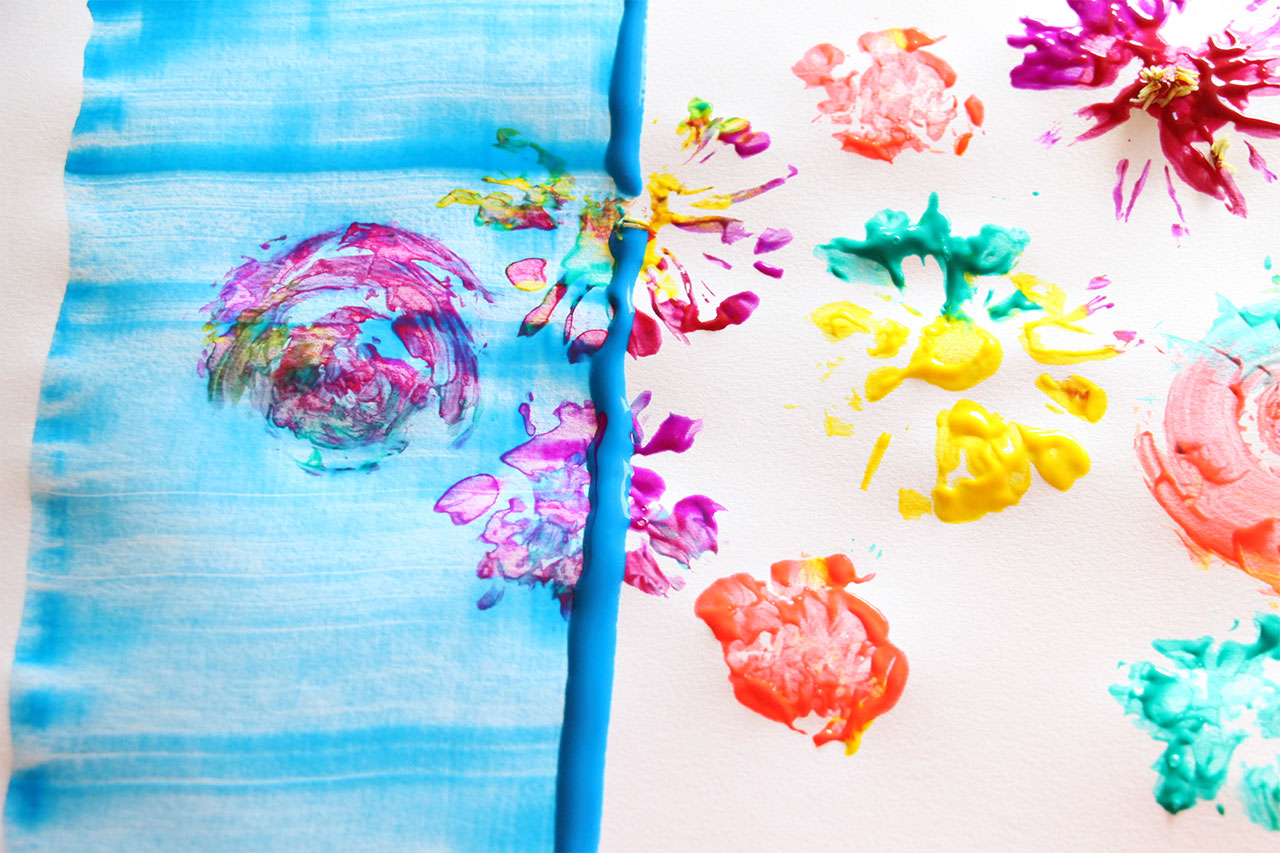
To transform your flower painting into a Monet-inspired work, you only need some blue paint and a ruler. Squeeze a line of blue paint along the far left edge of your painting. (Left-handed children might find it easier to manipulate the ruler if the paint is squeezed on the right edge of the painting).
Use the ruler as a scraper, and drag the blue paint across the paper.
If needed, add additional lines of paint in the middle of your artwork so that you can completely cover the paper with blue paint.
Don’t forget to send in your masterpiece to [email protected] to be showcased in our virtual art show!
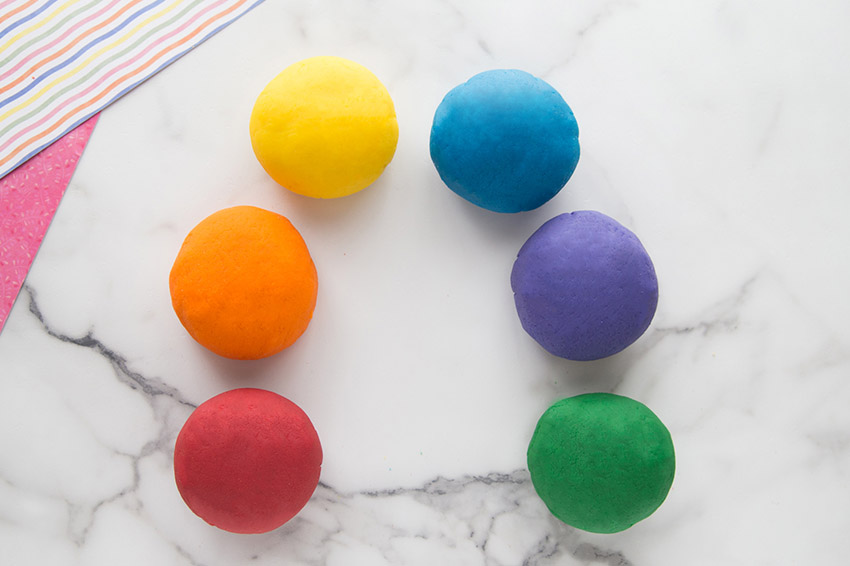
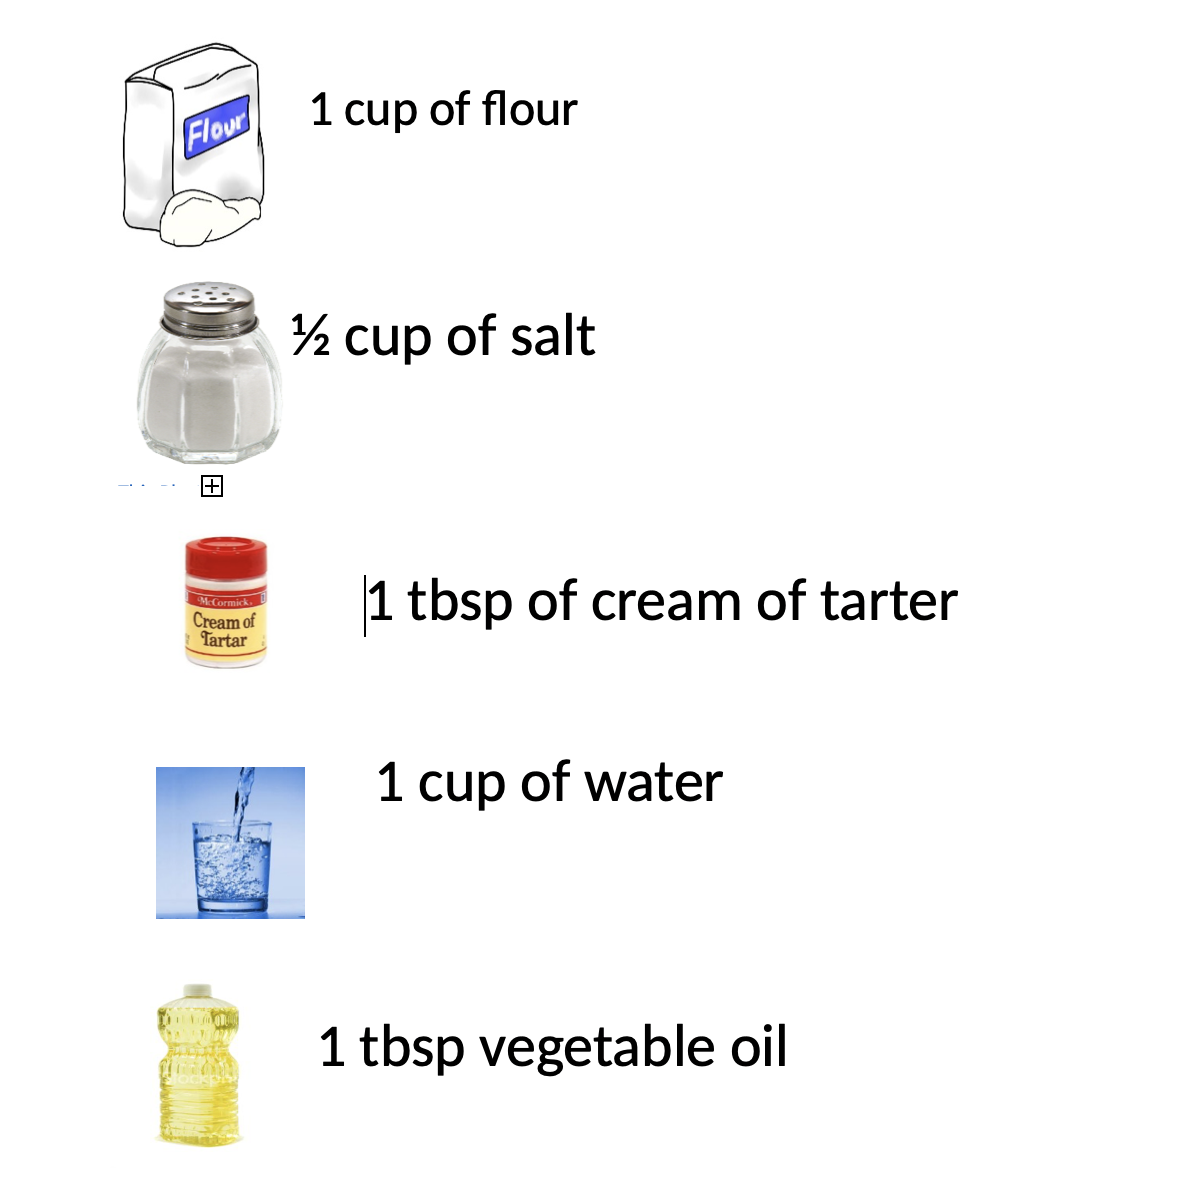
Playdough can provide endless hours of fun for tiny hands, take the activity one step further and make your own! Add smells and colors for more sensory fun!
Ingredients:
How To:
- Mix wet ingredients in a separate bowl. This is where you can add some extracts for a fun smell like vanilla, peppermint, banana, orange or strawberry. You can also add food coloring of your choice in this step.
- Mix dry and wet ingredients together well and try to get all the lumps out.
- Cook 1 minute in microwave safe bowl, stir well and do this 3X
- Spread a small amount of flour on table or counter, remove playdough from the bowl and knead. (be careful it will be hot!)
- Play!
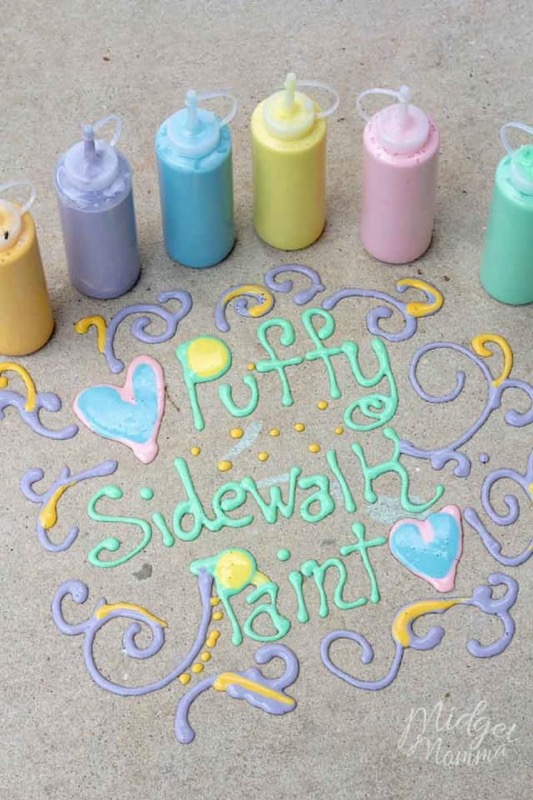
Looking for something fun to do with the kids and get them outside to play? Puffy sidewalk chalk! ♥
Puffy Sidewalk Chalk Paint Ingredients:
- 1 cup flour
- 1 cup water
- 1 tablespoon dish soap – just about any dish soap will work.
- 5-10 drops food coloring or washable paint
How to Make Sidewalk Chalk Paint:
- In a large mixing bowl stir together the flour and water until there are no lumps.
- Stir in the dish soap to the flour mixture.
- Add food coloring of your choice of color until the desired color is achieved.
- Pour the mixture into your squeeze bottle.
- Give the kids their new sidewalk paint and let them have fun!
Pro Tips:
- Use up the paint on the same day you make it, this recipe doesn’t save well… it will explode if you leave it closed.
- If you are making multiple colors, make each color in a different bowl or one at a time and pour into the bottles and then make the next color.